ComfyUI In Windows
Set Up ComfyUI Windows Portability
Follow these simple steps to set up ComfyUI_windows_portable on your Windows machine. This guide is written in easy-to-understand language and is beginner-friendly.
Step 1: Download ComfyUI Windows Portable
- Open your browser and go to the official ComfyUI GitHub repository: ComfyUI GitHub.
- Look for the Releases section and download the latest version of ComfyUI_windows_portable.zip.
- Ensure you download the portable version for Windows.
Step 2: Extract the Files
- Once the download is complete, locate the file in your Downloads folder.
- Right-click on the file ComfyUI_windows_portable.zip and select Extract All.
- Choose a folder where you want to extract the files. For example, you can create a new folder named
ComfyUIin **C:**. - Click Extract to unpack the files.
Step 3: Install Required Dependencies
- Before running ComfyUI, you need Python 3.10 or later installed on your system.
- Download Python from the official website: https://www.python.org.
- During installation, ensure you check the option Add Python to PATH.
- Install Git if not already installed:
- Download Git from https://git-scm.com/.
- Follow the installation wizard to complete the setup.
Step 4: Download a Checkpoint Model
To start using ComfyUI, you need a checkpoint model. This model is required to generate results.
Clip Models
Download the files below and place them in the ComfyUI > Models > Clip folder.
VAE Models
Download the file below and place it in the ComfyUI > Models > VAE folder.
Step 7: Install Required Python Packages
- Open the folder where you extracted ComfyUI.
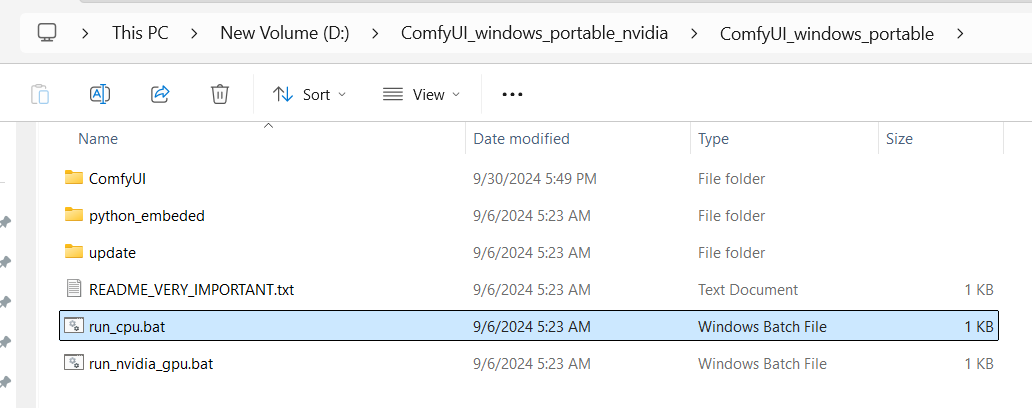
- Locate the run_nvidia_gpu.bat or run_cpu.bat file.
- If you are using an NVIDIA GPU, use run_nvidia_gpu.bat.
- If you don’t have a GPU or want to run it on CPU, use run_cpu.bat.
- Double-click the chosen file. It will:
- Automatically install the required Python libraries (like PyTorch and other dependencies).
Step 8: Start the ComfyUI Interface
- After the dependencies are installed, the script will automatically launch ComfyUI in your default browser.
- If it doesn’t open automatically:
- Look for the URL in the terminal, usually something like
http://127.0.0.1:8188. - Copy the URL and paste it into your browser to access the interface.

Step 9: Test Your Setup
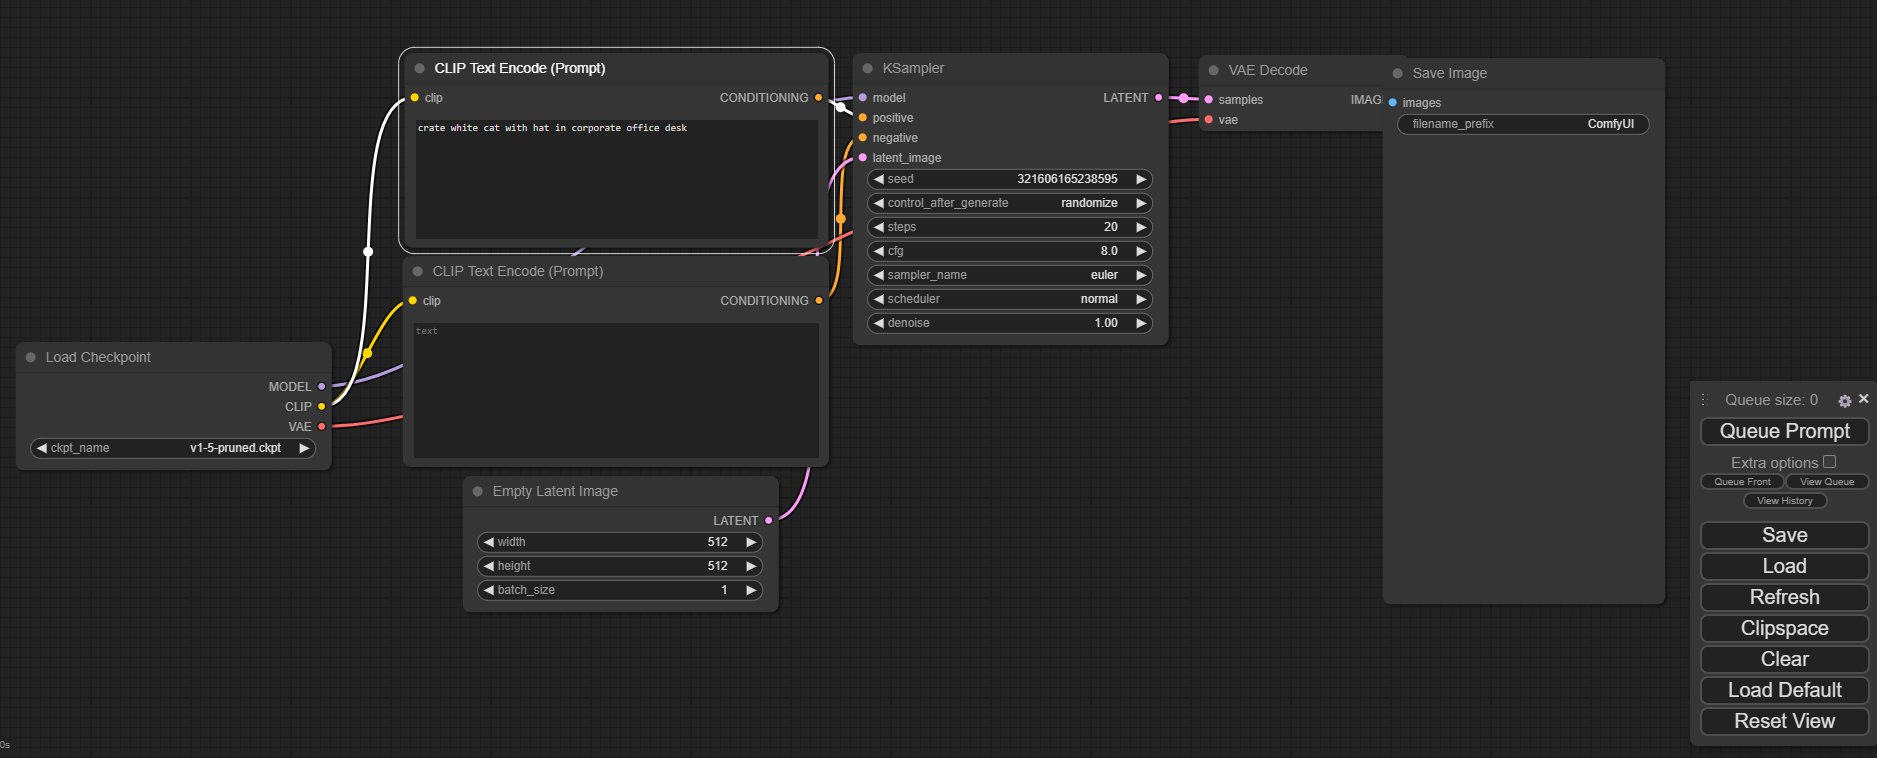
- Once the interface loads, test by adding sample workflows or generating a small task.
- If everything works, congratulations! Your ComfyUI setup is complete.

Troubleshooting Tips
-
Issue: Python not found
Ensure Python is installed and added to your PATH during installation. -
Issue: Files not extracting
Check if you have enough disk space or permissions in the folder where you're extracting the files. -
Issue: Dependencies not installing
Make sure your internet connection is active, as it will download packages during setup.
Final Notes
- Always ensure your drivers (especially GPU drivers) are up to date.
- If you face any issues, refer to the official ComfyUI documentation.
Happy exploring with ComfyUI!